# LVFX Calibration

## Required Equipment

- **Miller SFX9** Camera Tripod Head
- A perfectly rigid tripod capable of making the head perfectly level.
- **Fujinon UA46x13.5** Broadcast Lens
- **LVFX Sentinel** (small computer with pan, tilt, and zoom leads)
- **Windows PC** with LVFX installed
- **Network Router**
- **9V 2A Power Adapter** (USB-C)

## Tutorial Video  


Watch this quick set up guide to run through installation.

<video controls="controls" height="450" poster="" width="800"><source src="https://staging.media.lightningvisuals.com/virtuals-docs/2026-08-01-diagnosis/LVFX%20Setup%20v1.mp4" type="video/mp4"></source></video>

## Hardware Connection**[![miller-head.jpg](http://kb.lightningvisuals.com/uploads/images/gallery/2026-07/scaled-1680-/miller-head.jpg)](http://kb.lightningvisuals.com/uploads/images/gallery/2026-07/miller-head.jpg)**

1. **Mount the Tripod Head:** Mount the Miller head so it faces the finish line when the pan value is at zero.
    
    
    - Make sure the camera is **perfectly level**
    - For the SFX9, the white marker (the Pan Crossing) on the base must be on the **right**.
2. **Position the Sentinel:** Mount the LVFX Sentinel near the camera and make sure your camera is pointed towards the **centre-point** **on the horizon when powered on.**
3. **Connect the Video Cable:** Connect the SDI output from the camera into the GFX PC Decklink input.
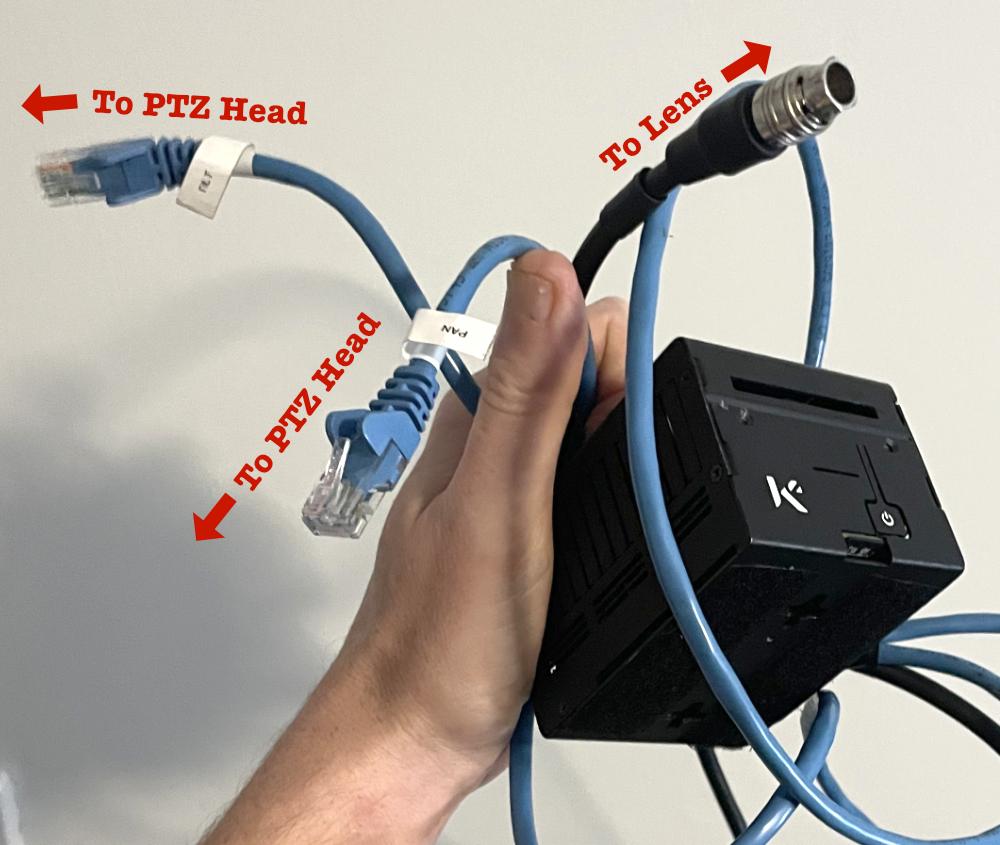
4. **Connect Sentinel Cables:**
    - **Zoom:** Connect the Sentinel’s HR-25 cable to the Fujinon lens' expansion port.
    - **Pan:** Connect the Sentinel’s Pan (RJ45) cable to the Miller’s Pan output.
    - **Tilt:** Connect the Sentinel’s Tilt (RJ45) cable to the Miller’s Tilt output.
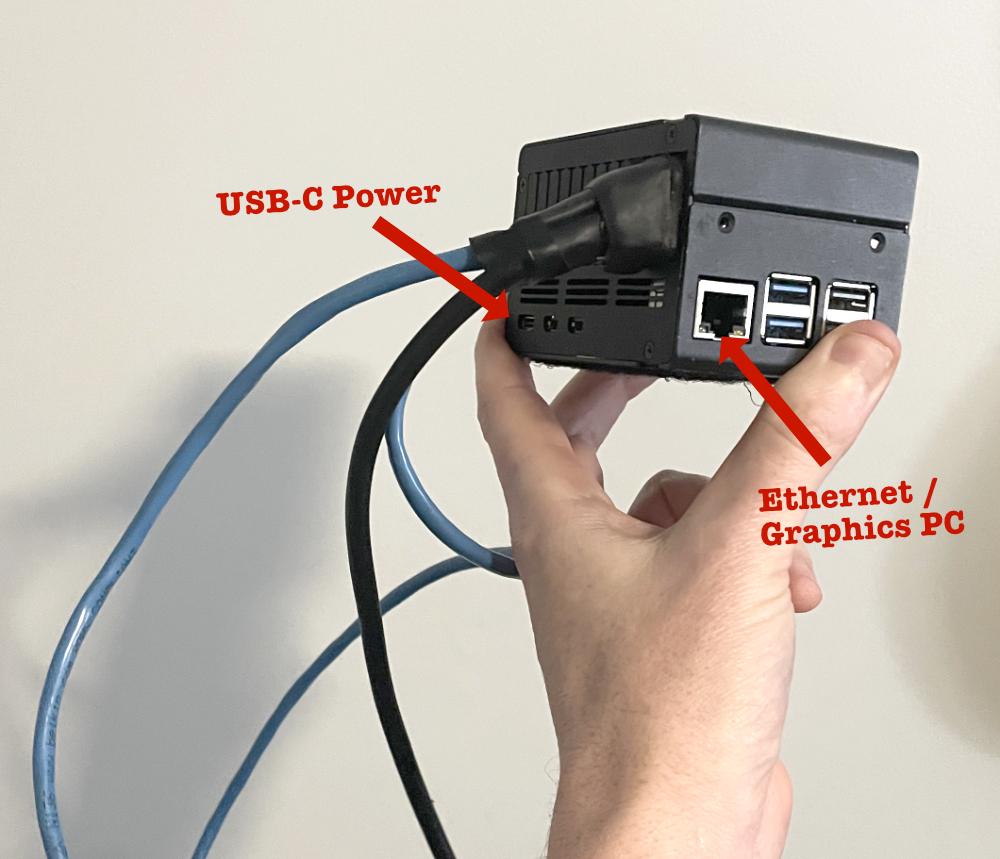
    - **Network:** Connect the Sentinel’s Ethernet port to the network router (or directly to the Graphics PC).
    - **Power:** Plug the 9V 2A USB-C power supply into the Sentinel.
        
        <table border="1" style="border-collapse: collapse; width: 100%; border-width: 1px;"><colgroup><col style="width: 49.8645%;"></col><col style="width: 49.8645%;"></col></colgroup><tbody><tr><td>[![sentinel-ports.jpg](http://kb.lightningvisuals.com/uploads/images/gallery/2026-07/scaled-1680-/sentinel-ports.jpg)](http://kb.lightningvisuals.com/uploads/images/gallery/2026-07/sentinel-ports.jpg)</td><td>[![sentinel-wires.jpg](http://kb.lightningvisuals.com/uploads/images/gallery/2026-07/scaled-1680-/sentinel-wires.jpg)](http://kb.lightningvisuals.com/uploads/images/gallery/2026-07/sentinel-wires.jpg)</td></tr></tbody></table>
        
        [![expansion.jpg](http://kb.lightningvisuals.com/uploads/images/gallery/2026-07/scaled-1680-/expansion.jpg)](http://kb.lightningvisuals.com/uploads/images/gallery/2026-07/expansion.jpg)
5. **Boot Up:** Wait for the light on the front of the Sentinel to turn green.

## Software Connection

1. Open the **LVFX** app on the Graphics PC.
2. Check to see if the correct scene is loaded in the titlebar. It should read your loacation (e.g. LVFX Live: melton). If it does not, click **Load Scene** (folder icon) in the top toolbar and select the file for your location (e.g., `scenes/melton/melton.json`).
3. Click **Inspect Camera** (camera icon) in the top-right toolbar.
4. Confirm connection: verify that the **Delay** value reads **under 0.1s**.

> If there's a high delay or no information under Camera Feed Stats (e.g. Camera #1 Feed Stats), the Sentinel likely isn't able to connect to the Graphics PC. Check that it's on, with a green light, and that the ethernet port is sending (pulsing green). Make sure the ethernet cable is connected to the same router, or directly to the graphics PC.

## Camera Calibration

1. Be sure the environment is right. Make sure the head is **perfectly level,** and that the sentinel and camera were **focused on the centrepoint at the horizon** when powered on. If anything unexpected happens during calibration, power off the sentinel, point your camera at the centrepoint and turn on the sentinel again.
2. Open the camera inspector (**Inspect Camera** icon) and click **Recalibrate**.
3. **Follow the on-screen calibration wizard:**
    
    
    - Zoom slowly all the way **in,** slowing down as you reach the limit.
    - Zoom slowly all the way **out,** slowing down as you reach the limit.
    - Pan across the horizon horizontally. (Point at the ground, point at the sky)
    - Tilt across the centre point vertically. (Pan all the way from left to right)
    - **Make sure to do both** the **zoom extents** and the **horizon crossing / forwards crossings** or the virtuals will absolutely not fit.
    - Make sure the camera is **Perfectly Level** if you want your previous fit to match properly.

**[![lvfx-interface.jpg](http://kb.lightningvisuals.com/uploads/images/gallery/2026-07/scaled-1680-/Dd1lvfx-interface.jpg)](http://kb.lightningvisuals.com/uploads/images/gallery/2026-07/Dd1lvfx-interface.jpg)**

**Adjust Virtual Fit (Optional):** If needed, adjust Virtual Fit to compensate for slight camera shifts, roll, or tilt.

> **Caution:** The camera was site-calibrated to this position. Avoid changing Virtual Fit unless necessary.

## Chroma Keying / Masking

LVFX supports up to **4 chroma keys** per camera (configured under **Vision Config** in the Camera Inspector). Update these periodically as lighting changes, or create a broad profile that works for both day and night.

1. Click **Inspect Camera** and open **Vision Config**.
2. Point the camera at the target background surface.
3. Select one of the four color slots 
    - [![virtuals_chroma_keys.png](http://kb.lightningvisuals.com/uploads/images/gallery/2026-08/scaled-1680-/virtuals-chroma-keys.png)](http://kb.lightningvisuals.com/uploads/images/gallery/2026-08/virtuals-chroma-keys.png)
4. Select the Color Picker tool 
    - [![virtuals_color_picker.png](http://kb.lightningvisuals.com/uploads/images/gallery/2026-08/scaled-1680-/virtuals-color-picker.png)](http://kb.lightningvisuals.com/uploads/images/gallery/2026-08/virtuals-color-picker.png)
5. Click the track surface on your monitor to sample the color. 
    - [![virtuals_color_picker_2.png](http://kb.lightningvisuals.com/uploads/images/gallery/2026-08/scaled-1680-/virtuals-color-picker-2.png)](http://kb.lightningvisuals.com/uploads/images/gallery/2026-08/virtuals-color-picker-2.png)
6. Repeat steps 3, 4 and 5 for up to four color slots, ensuring a broad range of track lighting (can be recalibrated throughout the evening)
7. Toggle **View: Mask** (top-left) to preview the key. 
    - [![virtuals_view_mask.png](http://kb.lightningvisuals.com/uploads/images/gallery/2026-08/scaled-1680-/virtuals-view-mask.png)](http://kb.lightningvisuals.com/uploads/images/gallery/2026-08/virtuals-view-mask.png)
8. Fine-tune the key intensity using the **Mask** slider in the Camera Inspector. 
    - [![adjust_mask.png](http://kb.lightningvisuals.com/uploads/images/gallery/2026-08/scaled-1680-/adjust-mask.png)](http://kb.lightningvisuals.com/uploads/images/gallery/2026-08/adjust-mask.png)

> Chroma keying needs to before performed each time there's a drastic change in lighting conditions. For this purpose, it's possible to add up to four keys from the same area.
> 
>   
> For example, for a night-to-day racing event, it's good practice to use them as follows:
> 
> 1. Sample a light daytime colour from the track
> 2. Sample a darker daytime colour from the track
> 3. Sample a lighter nighttime colour
> 4. Sample a darker nighttime colour

## Line Control

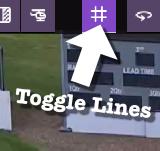
- **Local Control:** Toggle lines on/off using the **Show/Hide Lines** button (grid icon) in the top toolbar.
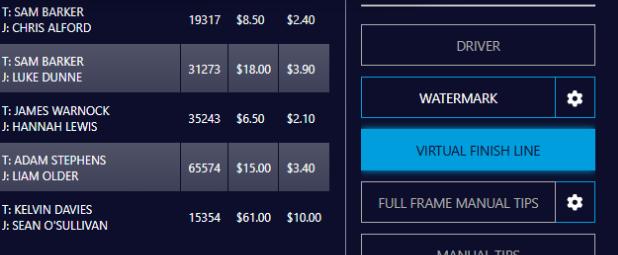
- **Remote Control:** Lines can also be controlled remotely via **Lightning Visuals Graphics Grub**.
    
    <table border="1" style="border-collapse: collapse; width: 100%;"><colgroup><col style="width: 50%;"></col><col style="width: 50%;"></col></colgroup><tbody><tr><td class="align-center">[![lines.jpg](http://kb.lightningvisuals.com/uploads/images/gallery/2026-07/scaled-1680-/lines.jpg)](http://kb.lightningvisuals.com/uploads/images/gallery/2026-07/lines.jpg)</td><td class="align-center" width="75%">[![lines2.jpg](http://kb.lightningvisuals.com/uploads/images/gallery/2026-07/scaled-1680-/lines2.jpg)](http://kb.lightningvisuals.com/uploads/images/gallery/2026-07/lines2.jpg)</td></tr></tbody></table>

> The button inside LVFX overrides the button in Grub, but it also reflects the button in Grub when controlling remotely. To test the connection, press the Grub button a few times and make sure the button inside LVFX is reflecting the changes.

## Fine-Tuning

### Minor Adjustments

If the alignment is slightly off, the camera most likely is not **perfectly level.** Make it perfectly level then use **Drag Camera Heading** or **Drag Camera Mounting** in the toolbar if you absolutely must.

> Use adjustments these sparingly. Physically levelling the head is always more effective than software adjustments.

## Troubleshooting

For further troubleshooting steps,[ see this article.](http://kb.lightningvisuals.com/books/lvfx-user-guides/page/lvfx-troubleshooting "LVFX Troubleshooting")