Schedule Builder
User Guide
How to use the Schedule Builder system.
Access
If you have access to Schedule Builder, you will be able to see a "Schedule Builder" tab after you log in and go to the home page (click the boldened "VIDLAY V2").

Clicking on this tab will bring you to the Schedule Builder where you can see and edit events.
Changing the date
A date selector in the top left can be used to change the date of the schedule you are looking at.
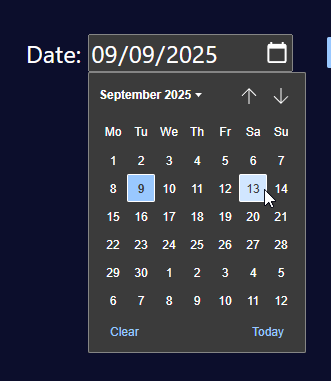
On initial load, it will go to today's date but if you need to see or edit a schedule in advance, you can select a future date.
Once you have selected a date, you can start adding events.
Adding events
In the top right, there is a button for to bring up a panel where you can add events:
Importing races
The "Import Races" panel will allow you to add events for race events. It will show you the selected day's races.
Note: If no venues show, it may mean that the system has not loaded that day's events yet and you will need to wait closer to the day before scheduling events. Generally, we only support preparing schedules 1 day in advance.
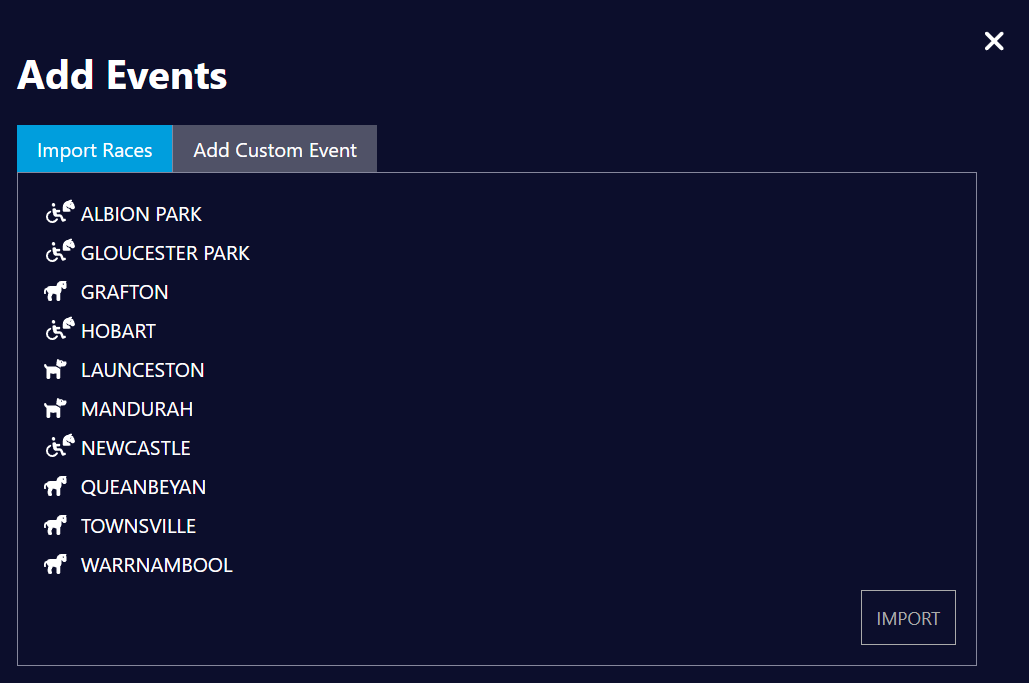
First select the venue. This will bring up a list of races at that venue:
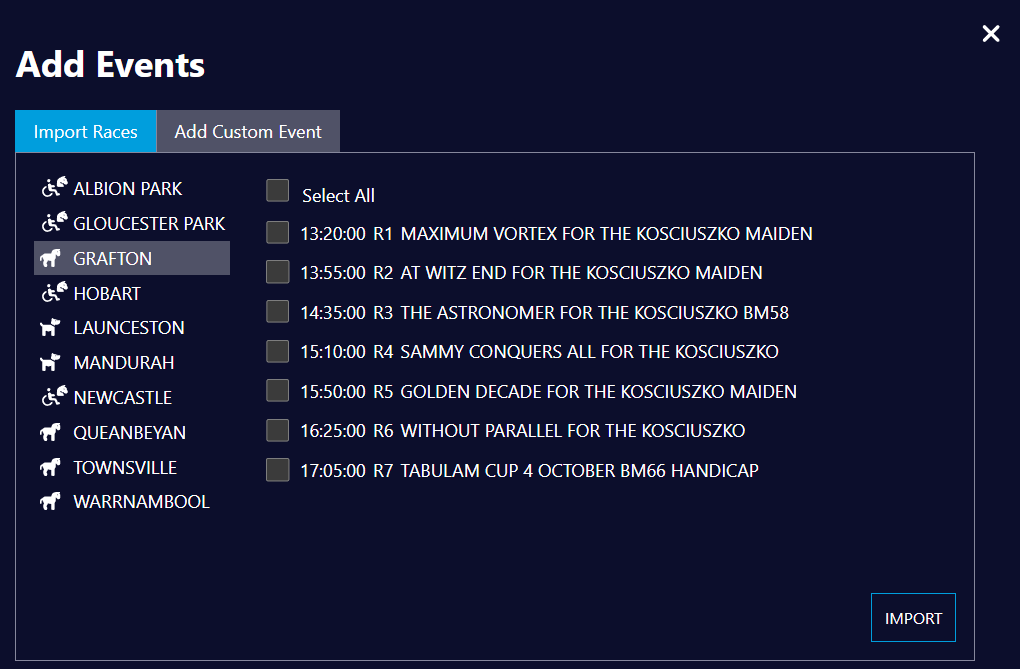
You can then use the "Select All" checkbox and individual race checkboxes to select which races you want to import. Once a selection has been made, you can click the import button to add those events.
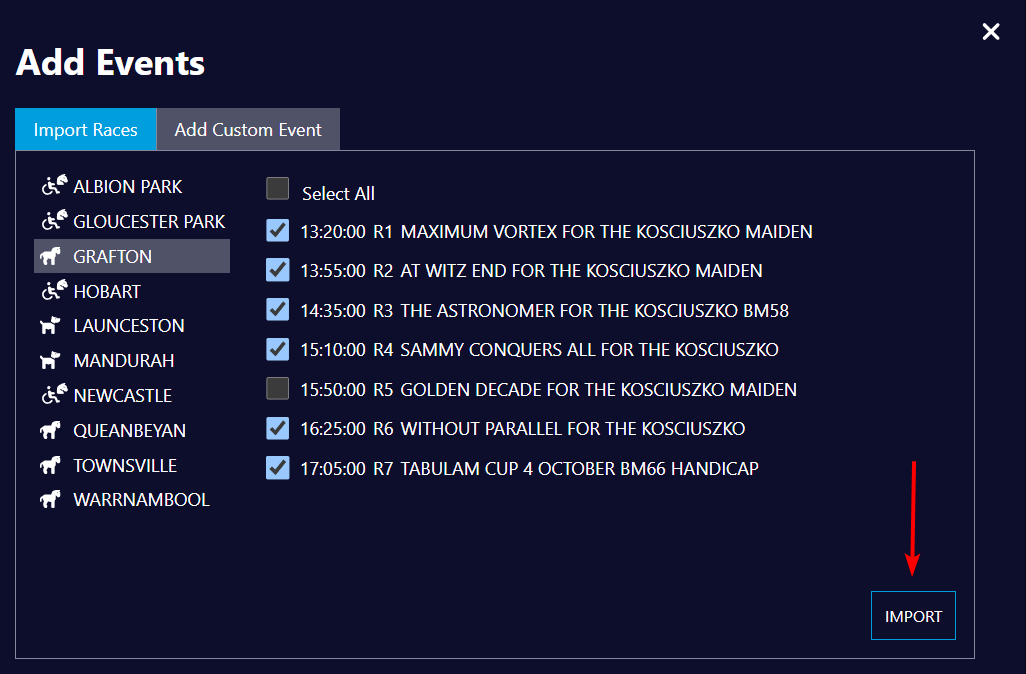
These races should show up as events in the schedule. Each venue's races must be imported separately to the schedule. If you wish to add notes to the events, you will need to edit the event after the import. See section Editing an event.
Note: Take care to not import a venue's races more than once otherwise you will end up with duplicate events in the schedule. They may need to be manually cleared if this happens.
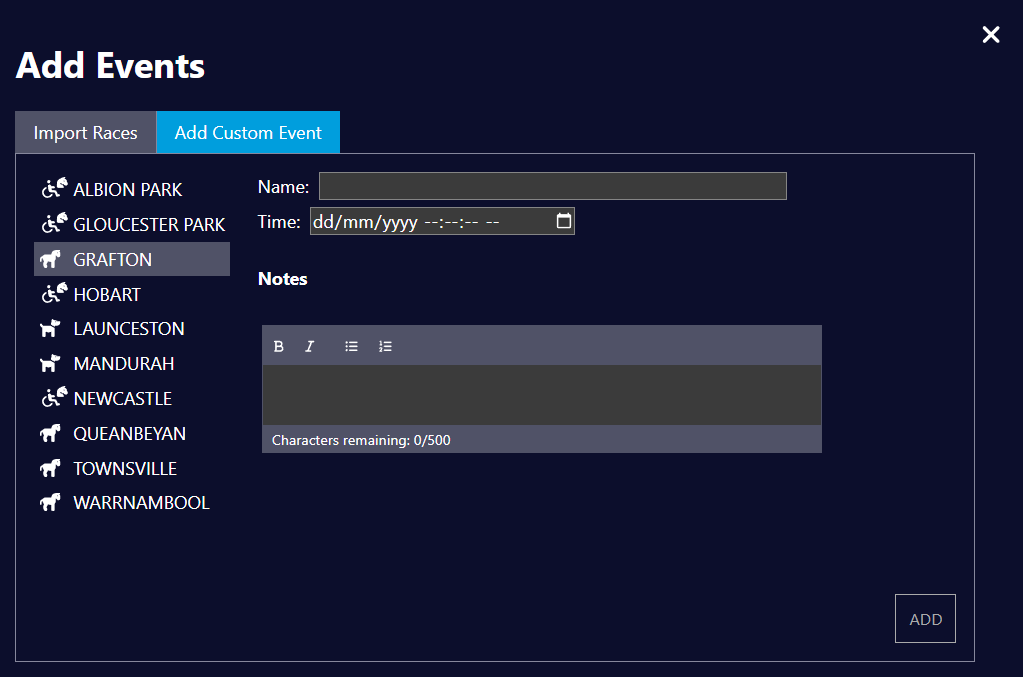
Adding custom events
The "Add Custom Event" allows you to add an ad-hoc event with a custom name and time into the schedule.
The schedule
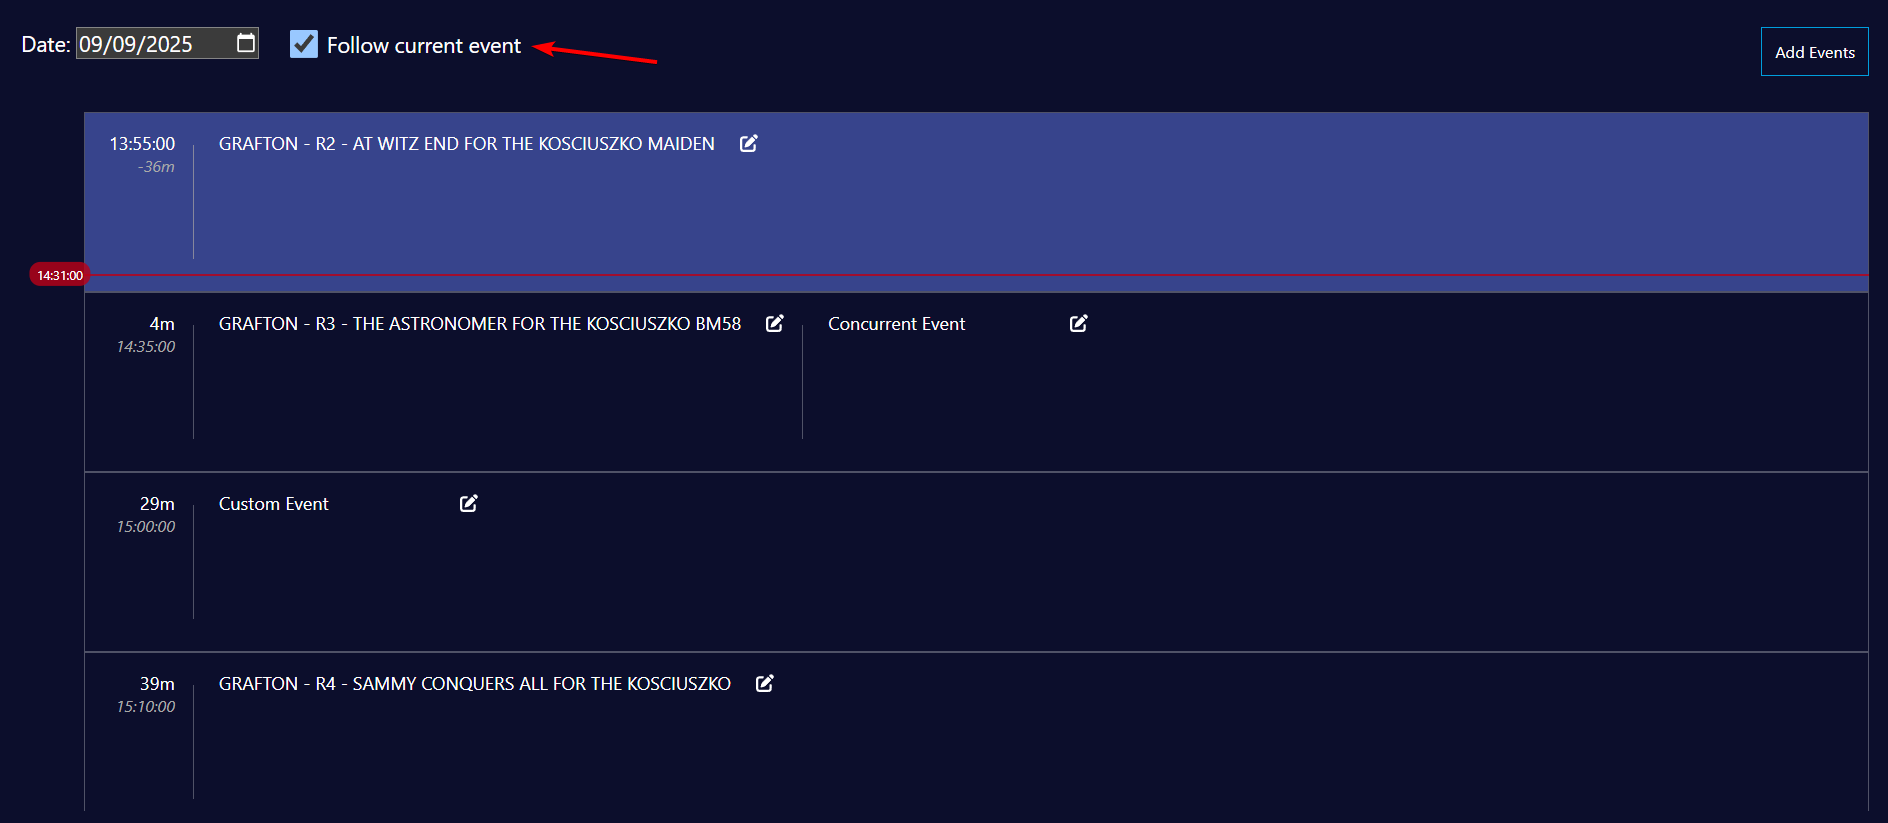
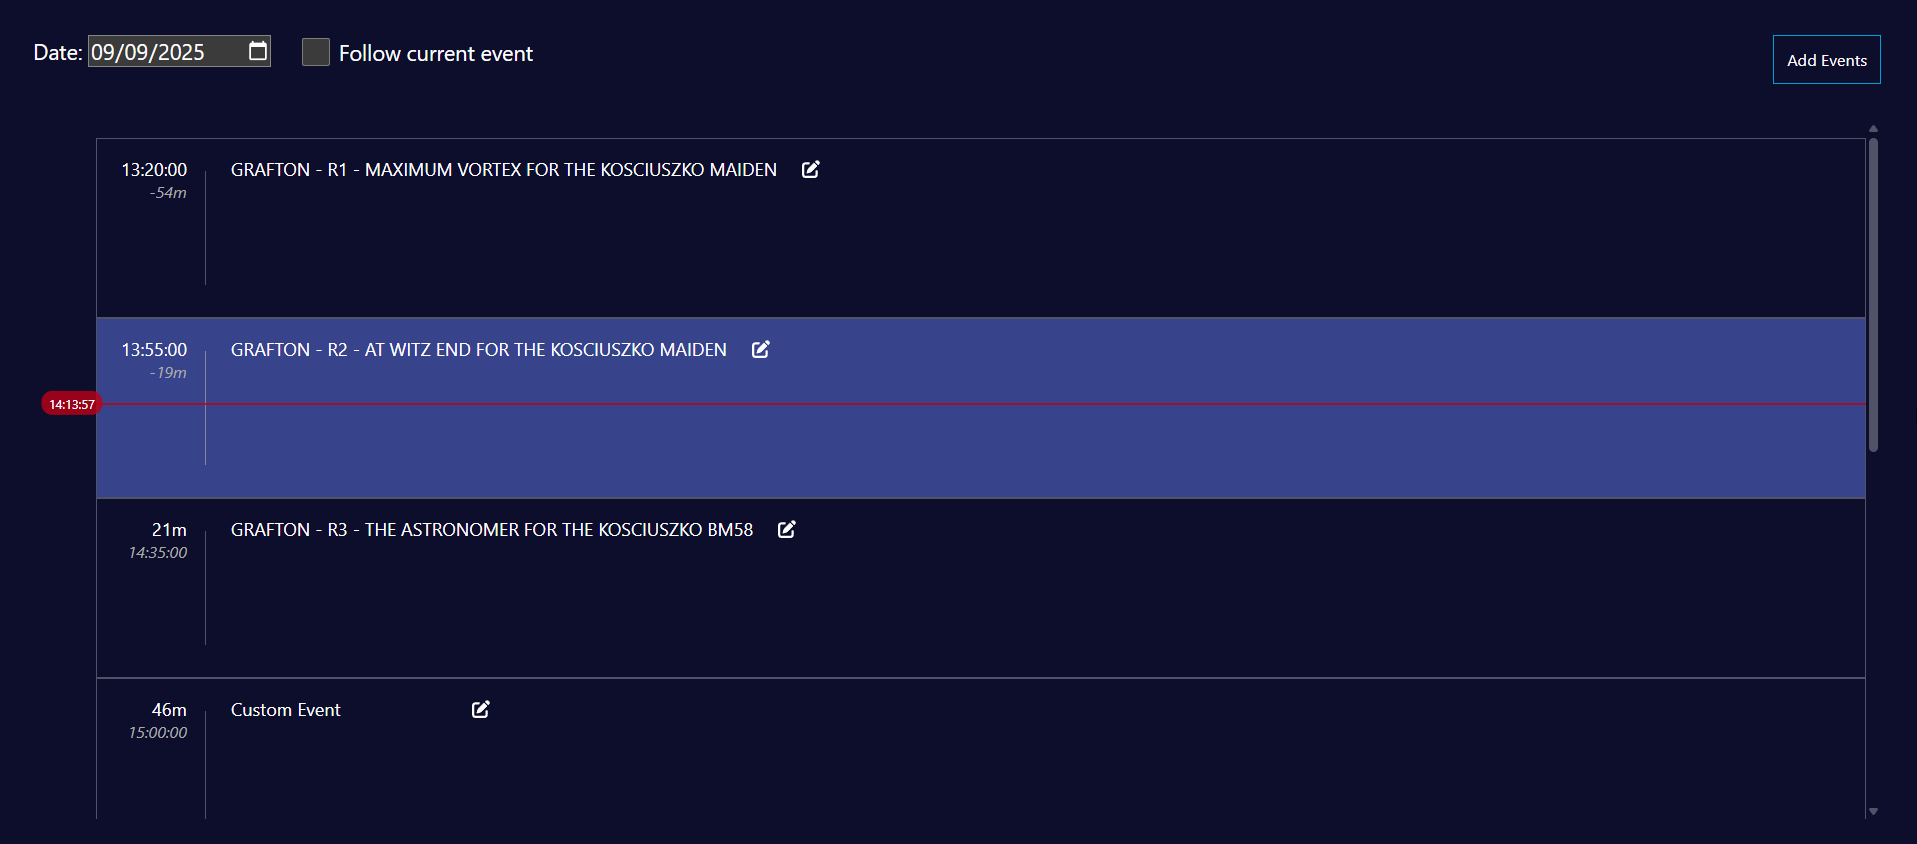
This is the main page of the schedule builder
The "Current" event
A red line shows the current time and will also allow you to determine the approximate progress of the current event. The current event is highlighted in lighter blue. On the left side of the divider, details regarding the time will show:
- For previous events and current event
- White: The time of day (your current time zone)
- Grey: The time since the event
- For future events:
- White: The time until the event
- Grey: The time of day (your current time zone)
When it is at least 2 mins out from the next event, the time until the event will show the seconds:
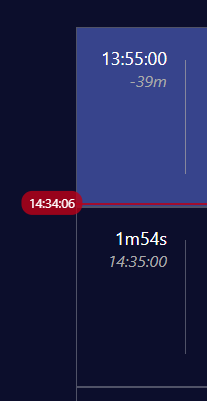
Concurrent events
Events that have the same start time as other events will be listed in a row with a divider:

They can be assigned separate notes.
Inserting events
If you need to insert an event after an event, you can hover over the divider between events to show a "+" bar.
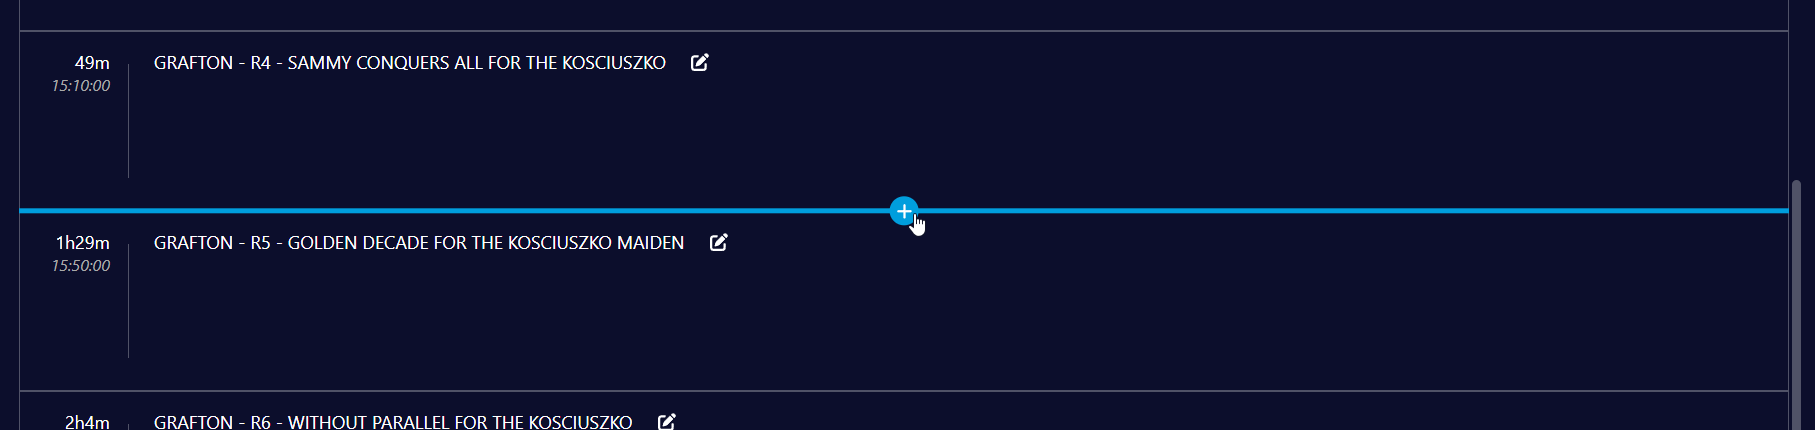
Clicking the bar will bring you to the "add event" modal. A venue needs to be selected and a event name + optional notes can be entered. The time is prefilled out to be the time of the event before the "+" bar. You can update this or leave it as is to create a concurrent event.
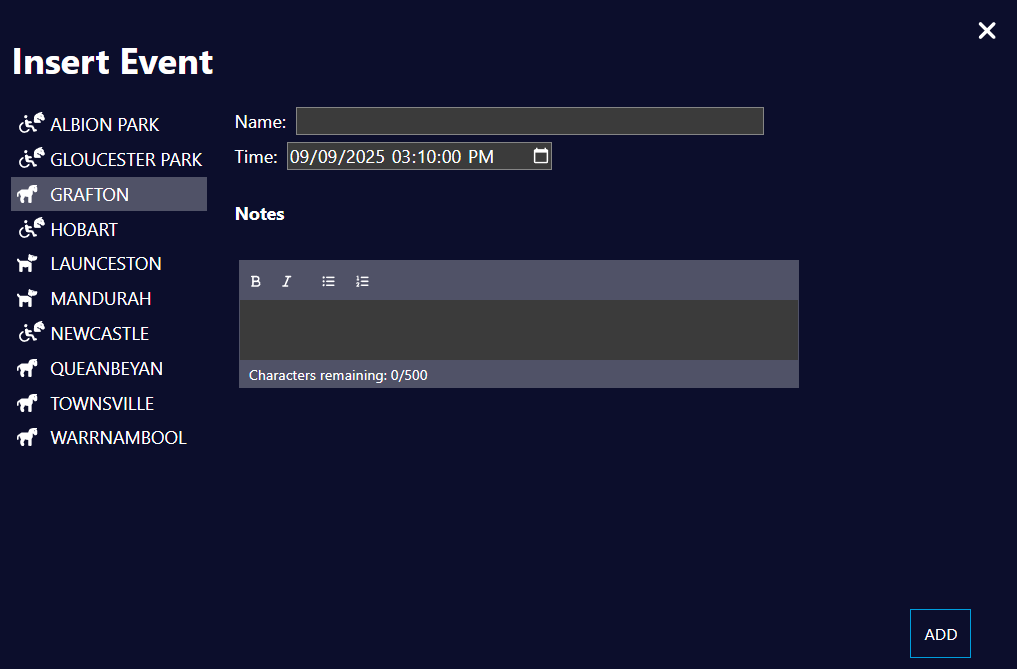
Editing an event
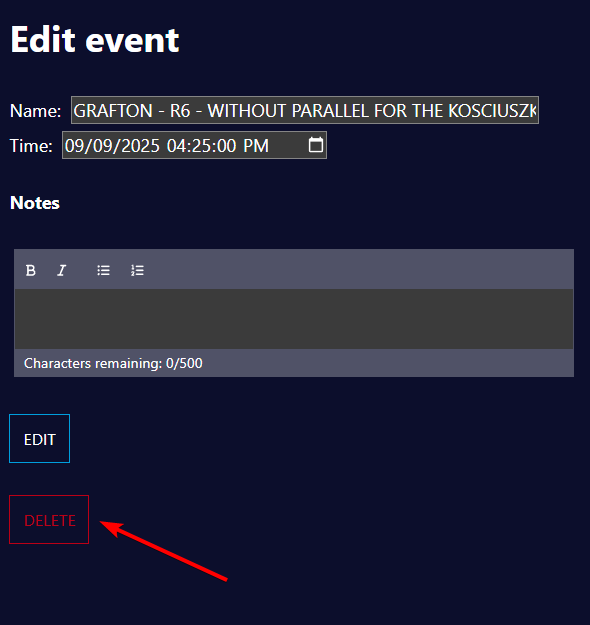
Each event has an edit button which can be used to edit the details of an event. It is also where you can change the notes.
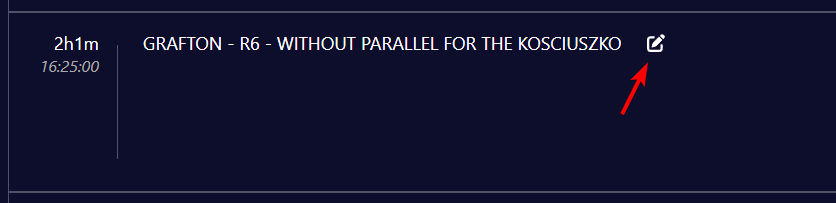
Adding notes
Notes can be edited in the long-form text box. Various features can be used to format the notes that need to be left.
Note: There is a 500 character limit including extra characters used for formatting dot points/boldened text
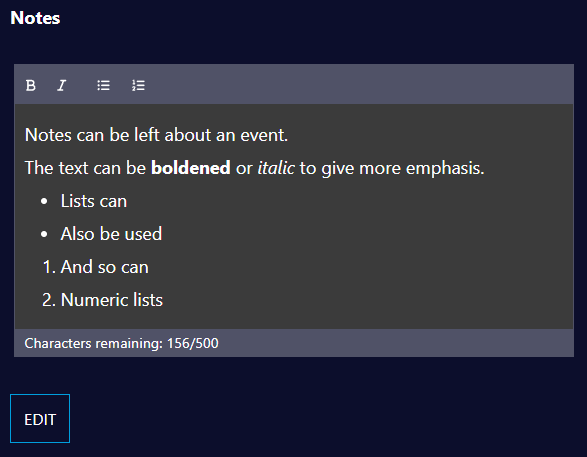
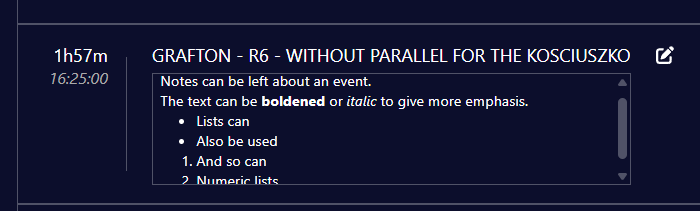
Once you are happy, clicking the "edit" button will update the notes. They are then rendered under the event. A scroll wheel can be used if the notes are long.
Following the current event
Ticking the "Follow current event" textbox will lock scrolling and keep the current event at the top of the screen. This will automatically update as soon as the next event is reached.