
LVFX Calibration
Required Equipment
-
Miller SFX9 Camera Tripod Head
-
Fujinon UA46x13.5 Broadcast Lens
-
LVFX Sentinel (small computer with pan, tilt, and zoom leads)
-
Windows PC with LVFX installed
-
Network Router
-
9V 2A Power Adapter (USB-C)
Hardware Connection
-
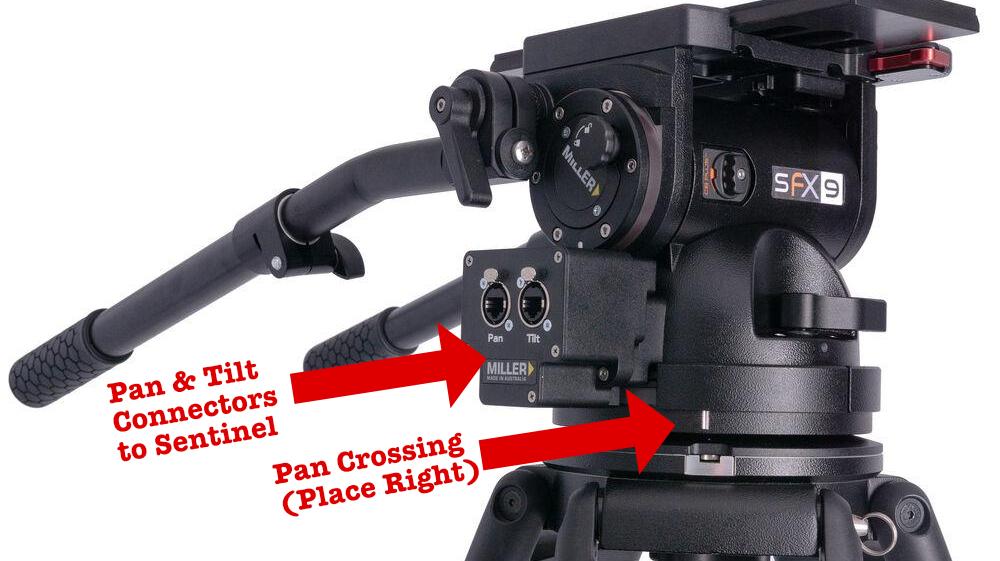
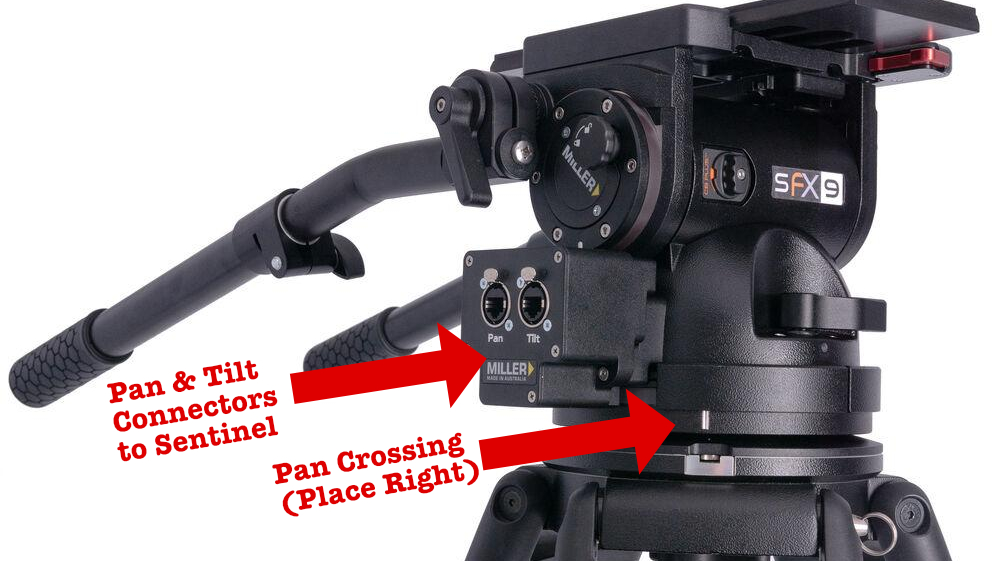
Mount the Tripod Head: Mount the Miller head so it faces the finish line when the pan value is at zero.
Note: For the SFX9, the white marker (the Pan Crossing) on the base must be on the right.
-
Position the Sentinel: Mount the LVFX Sentinel near the camera.
-
Connect Cables:
-
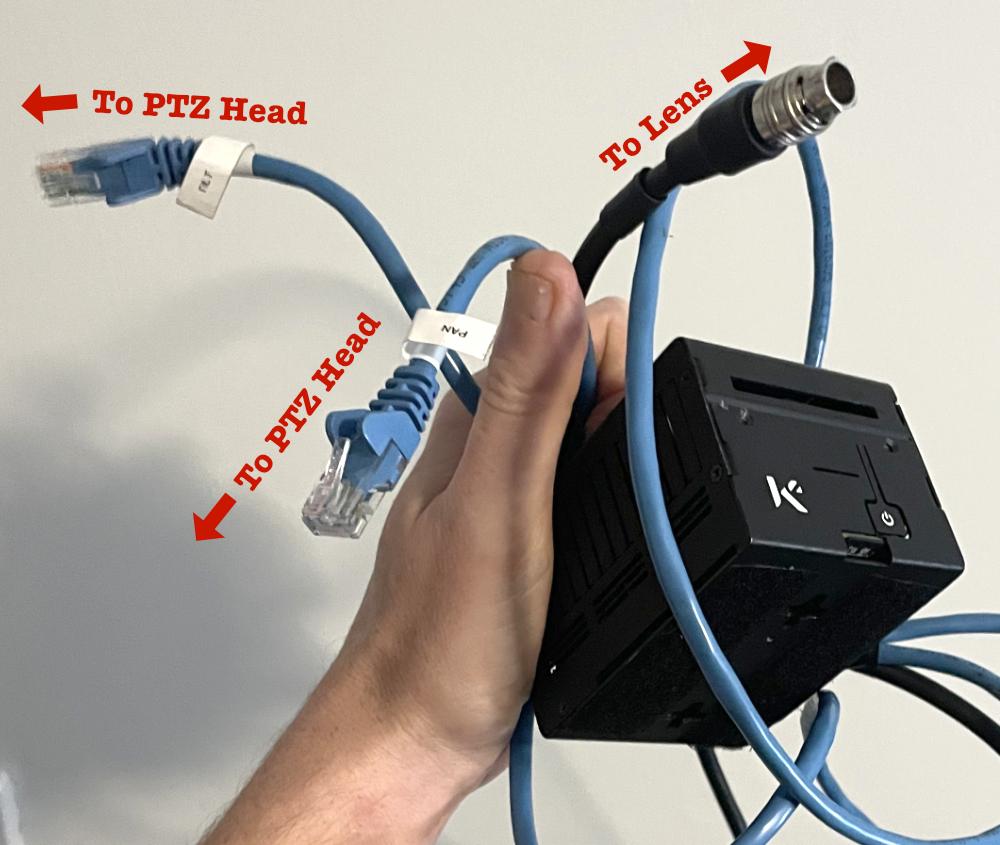
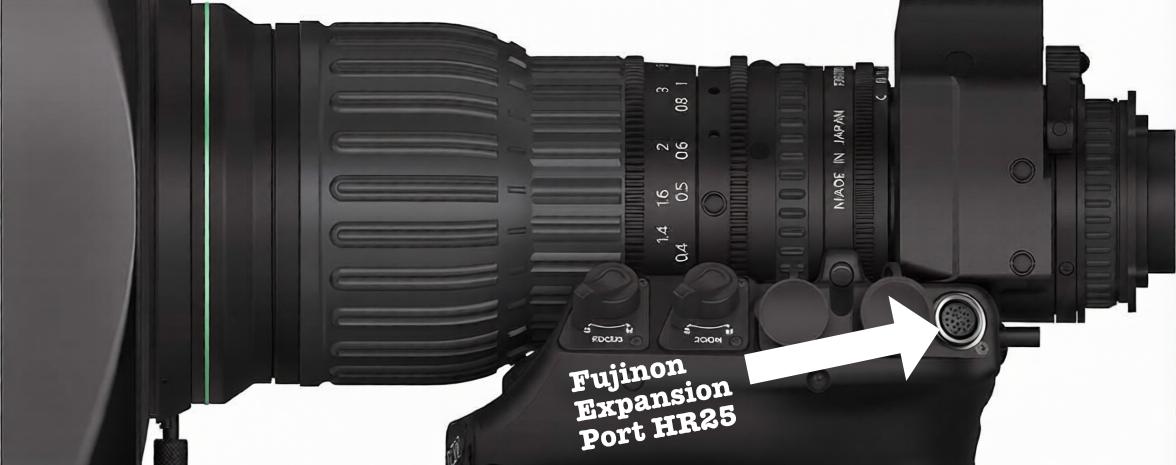
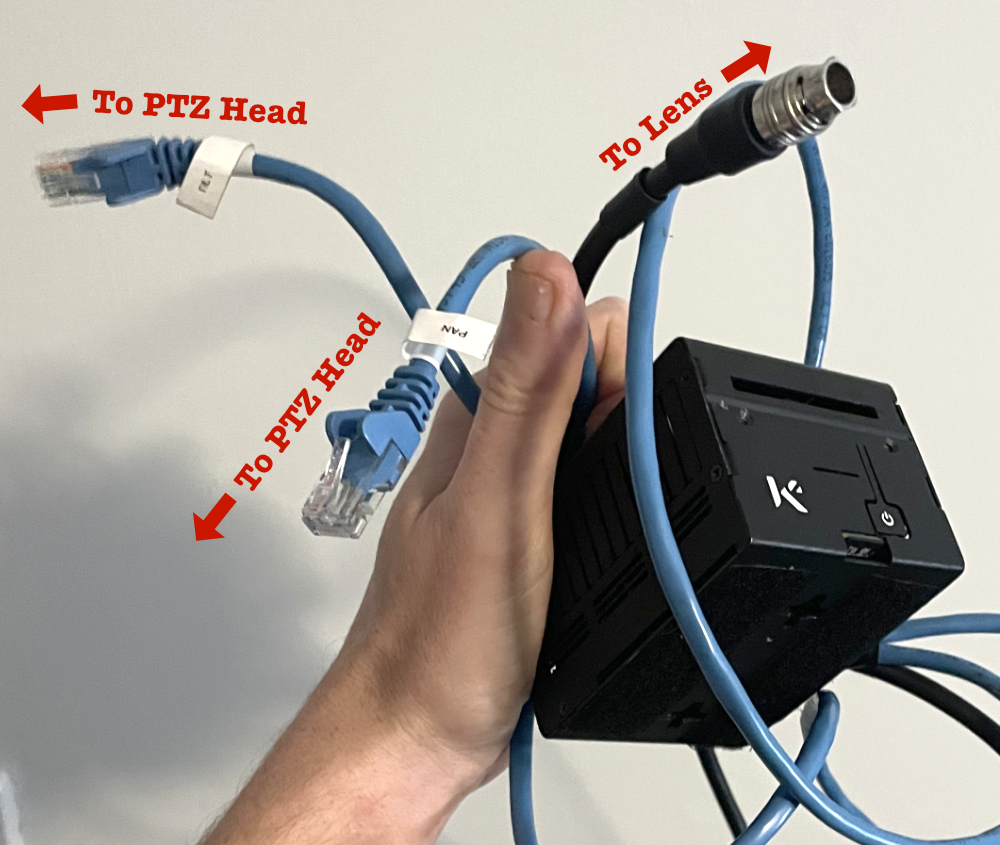
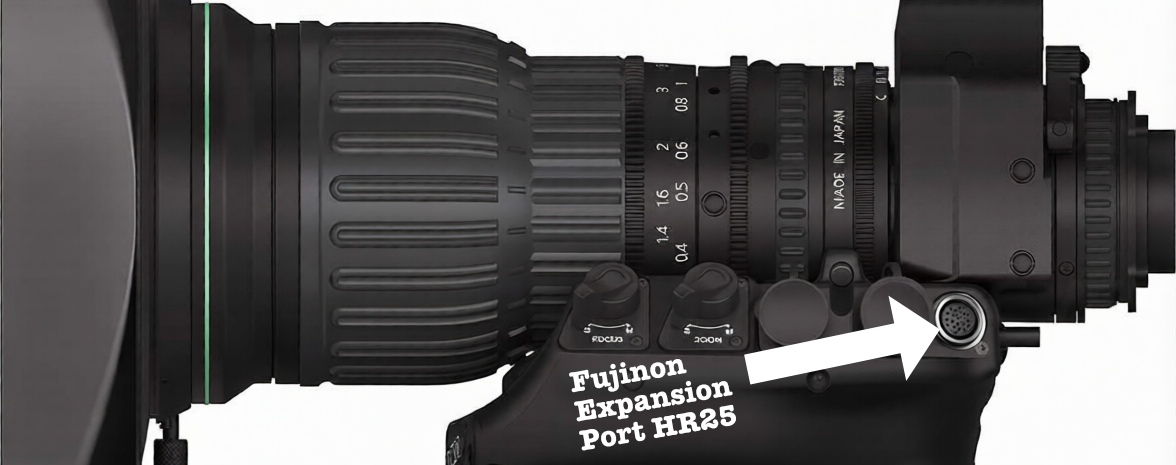
Zoom: Connect the Sentinel’s HR-25 cable to the Fujinon lens' expansion port.
-
Pan: Connect the Sentinel’s Pan (RJ45) cable to the Miller’s Pan output.
-
Tilt: Connect the Sentinel’s Tilt (RJ45) cable to the Miller’s Tilt output.
-
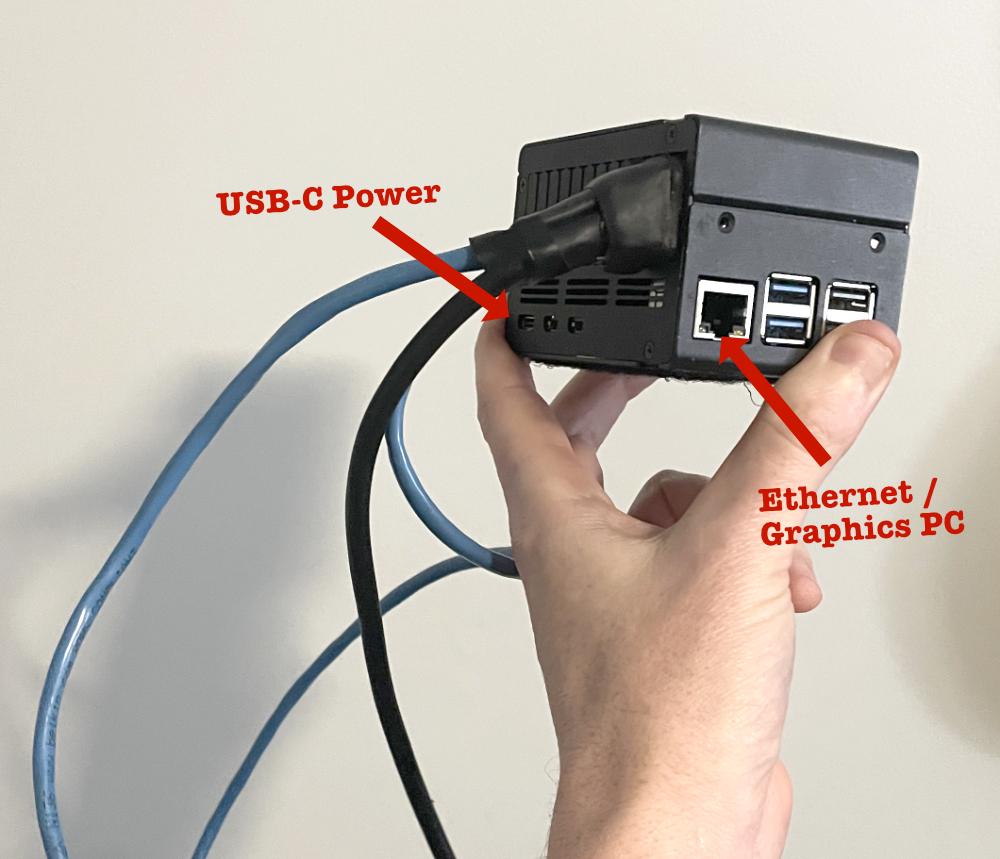
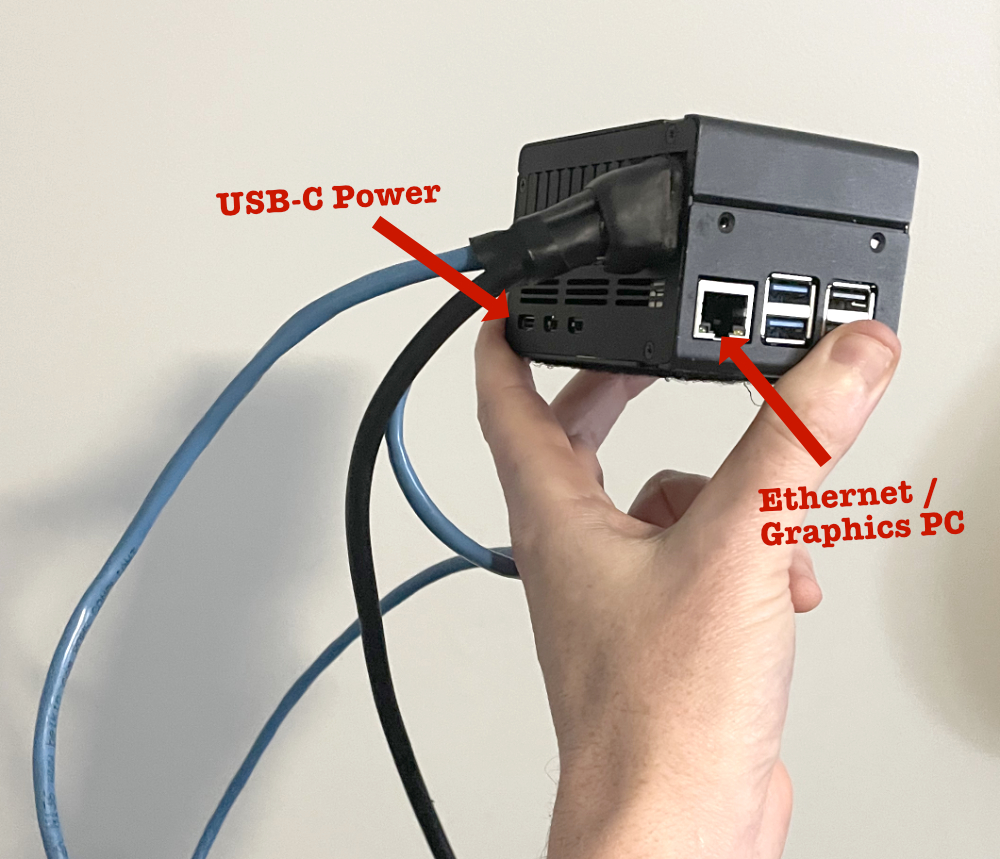
Network: Connect the Sentinel’s Ethernet port to the network router (or directly to the Graphics PC).
-
Power: Plug the 9V 2A USB-C power supply into the Sentinel.
-
-
Boot Up: Wait for the light on the front of the Sentinel to turn green.
Software Connection
-
Open the LVFX app on the Graphics PC.
-
Click Load Scene (folder icon) in the top toolbar and select the file for your location (e.g.,
scenes/melton/melton.json). -
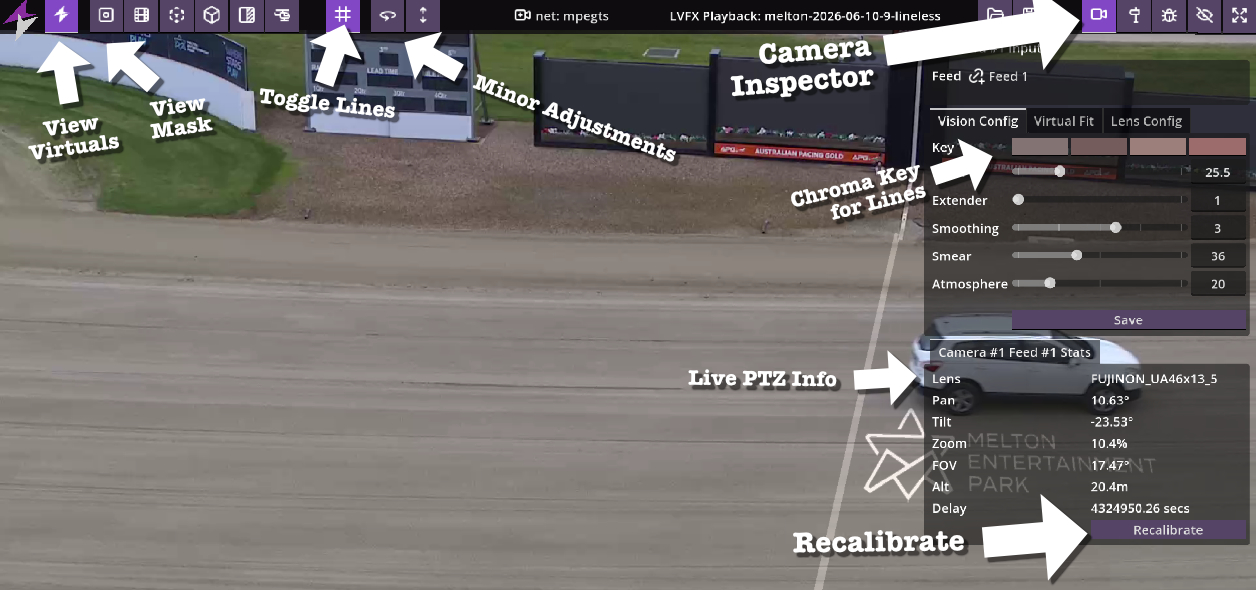
Click Inspect Camera (camera icon) in the top-right toolbar.
-
Confirm connection: verify that the Delay value reads under 0.1s.
If there's a high delay or no information under Camera Feed Stats (e.g. Camera #1 Feed Stats), the Sentinel likely isn't able to connect to the Graphics PC. Check that it's on, with a green light, and that the ethernet port is sending (pulsing green). Make sure the ethernet cable is connected to the same router, or directly to the graphics PC.
Calibration
-
Open the camera inspector (Inspect Camera icon) and click Recalibrate.
-
Follow the on-screen calibration wizard:
-
Zoom slowly all the way in.
-
Zoom slowly all the way out.
-
Pan across the horizon horizontally.
-
Tilt across the center point vertically.
-
-
Adjust Virtual Fit (Optional): If needed, adjust Virtual Fit to compensate for slight camera shifts, roll, or tilt.
Caution: The camera was site-calibrated to this position. Avoid changing Virtual Fit unless necessary.
Chroma Keying / Masking
LVFX supports up to 4 chroma keys per camera (configured under Vision Config in the Camera Inspector). Update these periodically as lighting changes, or create a broad profile that works for both day and night.
-
Click Inspect Camera and open Vision Config.
-
Point the camera at the target background surface.
-
Select one of the four color slots, then click the surface on your monitor to sample the color.
-
Toggle View: Mask (top-left) to preview the key.
-
Fine-tune the key intensity using the Mask slider in the Camera Inspector.
Line Control
-
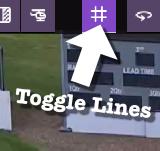
Local Control: Toggle lines on/off using the Show/Hide Lines button (grid icon) in the top toolbar.
-
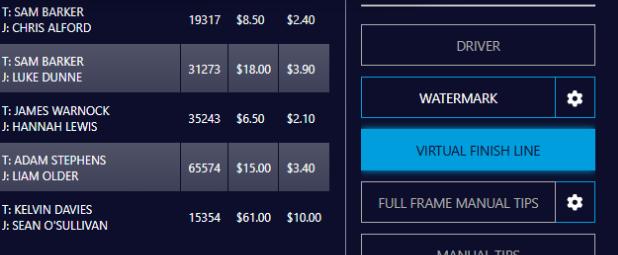
Remote Control: Lines can also be controlled remotely via Lightning Visuals Graphics Grub.
Fine-Tuning & Troubleshooting
Minor Adjustments
If the alignment is slightly off, use Drag Camera Heading or Drag Camera Mounting in the toolbar.
Use adjustments these sparingly. Physically levelling the head is always more effective than software adjustments.
Major Adjustments
If the virtual overlays remain misaligned after following these steps, contact Lightning Visuals support.